MySight
- Jennifer Geers (Unlicensed)
- Dennis Mergemann (Unlicensed)
Working with EFS MySight
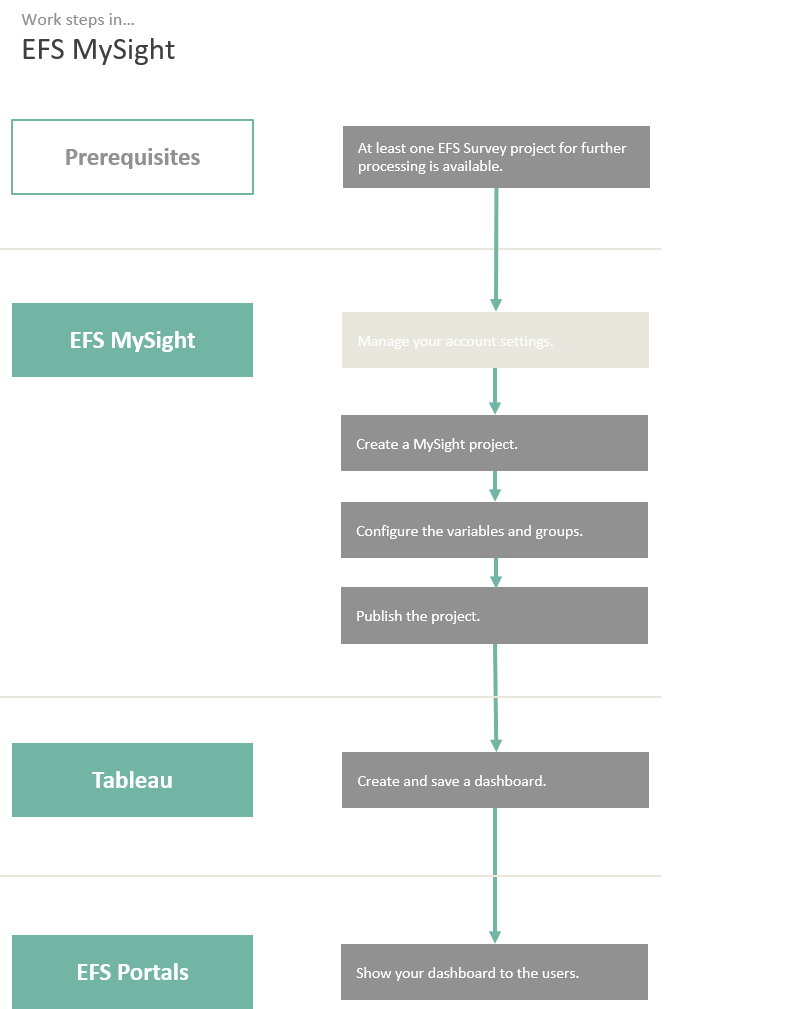
MySight is an EFS embedded module that provides feedback data optimized for easy use in Tableau. With this data, you can use Tableau to create dynamic dashboards, which are then displayed to the users via EFS Portals.
MySight allows you to prepare data sets with up to five EFS projects for Tableau. In MySight, you select the variables and records of the project that you want to use for your dashboard, and also determine how they should be prepared for further use:
You can select the required questions and background data as well as additional dimensions for filtering and splitting the data.
In MySight you decide if you want to map the data of a project in one dashboard, or if you want to combine multiple survey data and compare it. For example, to show the development of a repetitive survey over a longer period of time.
You can also specify if a variable should be displayed in your dashboard as a cross table, split or filter and then assign the setting Dimension to it. This is often useful for demographic and geographic data, or for other distinguishing criteria and segments whose detailed combination and filtering capabilities are relevant to your evaluation.
Then you configure the Access control. Here you determine which user groups have access to your dashboard. You can also select Additional Account Information. Based on this information, you have another filtering option and can narrow down which dashboards are visible to which users.
MySight Front Page
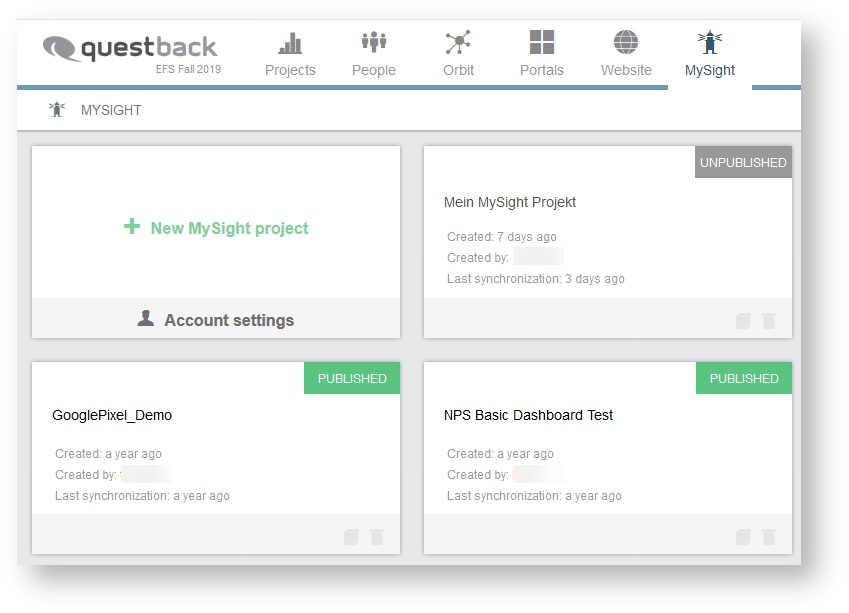
The MySight icon in the navigation bar of EFS, a lighthouse, takes you to the front page of the MySight module. In addition to the filter functions and a search function in the upper right hand corner, this page offers you an overview of existings projects as well as the possibility to add new projects using the tile button + New MySight Project.
On the back of this tile button the database connection details and the button Create account are located.
You navigate to the Tableau server via the Account settings on the tile button or via the icon under the Keyword "Connection" on the information board.
Filter and search functions
The two filter functions ensure the necessary clarity of the front page, which may not always be available due to the high number of the possible projects. You filter the projects using the function Created by according to who created them. The filter function status allows you to filter the projects according to their status, whether the project has been published, unpublished, synchronized with the Tableau server, or whether an error has occurred during synchronization. The search function is used to find projects by name. You use both numbers and words for this search.

Information
Account Settings
If you click on the button Account settings located at the bottom of the tile, the tile button will reset the password and with a further click on Create account, you will see the following information about the tableau user account of the user logged in via EFS:
email address
full name
role (e.g. site administrator)
password
Once you have retrieved the password, a new password is generated each time you click on the button Create account. The MySight software does not store the once generated password, which is not an hindrance for the login process. You always use a new password to log on the Tableau server if you don 't like to store the password once issued elsewhere.
Create Project
When you click on the tile button + New MySight project, a MySight project tile will appear. The tile contains the following informations in addition to the two functions, copying and deleting the project:
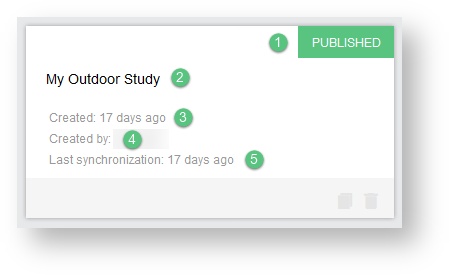
Project status: published or unpublished
Project name
Creation date
Creator
last synchronization
You enter a name for the MySight project on the tile. Then you confirm with the green check mark and discard with the red X. To access this MySight project, you click on the white area of the tile. Once the project has been published, the name can no longer be edited. However, if the published MySight project is withdrawn, the project name can also be edited again.
Configure variables and groups
To configure your project, click on the appropriate tile.
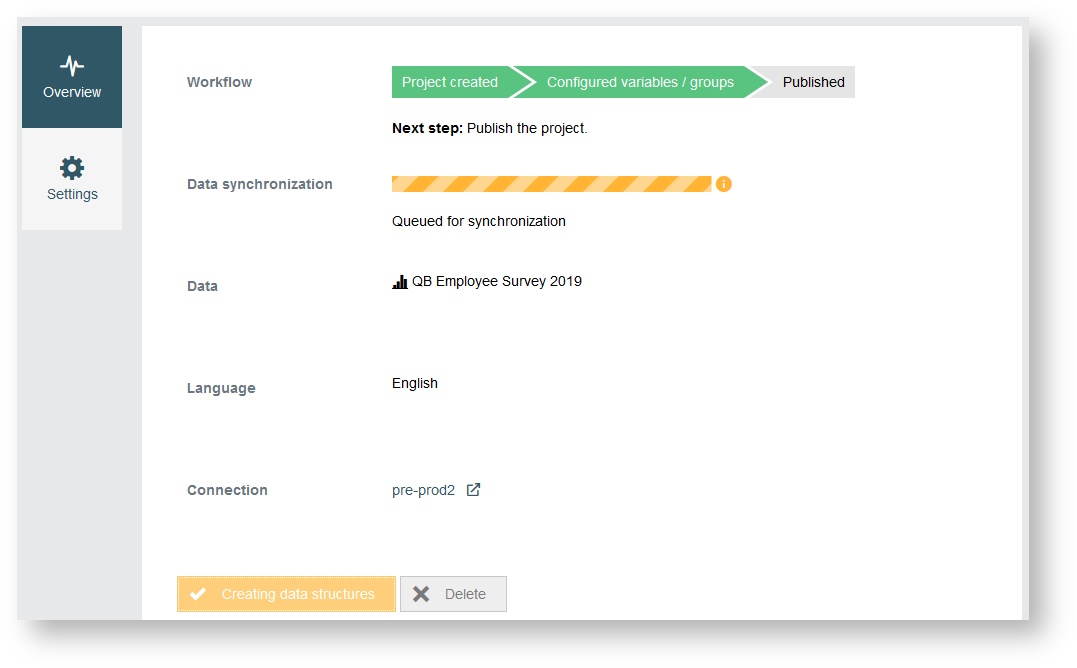
The project page opens, which gives you an Overview of your project:
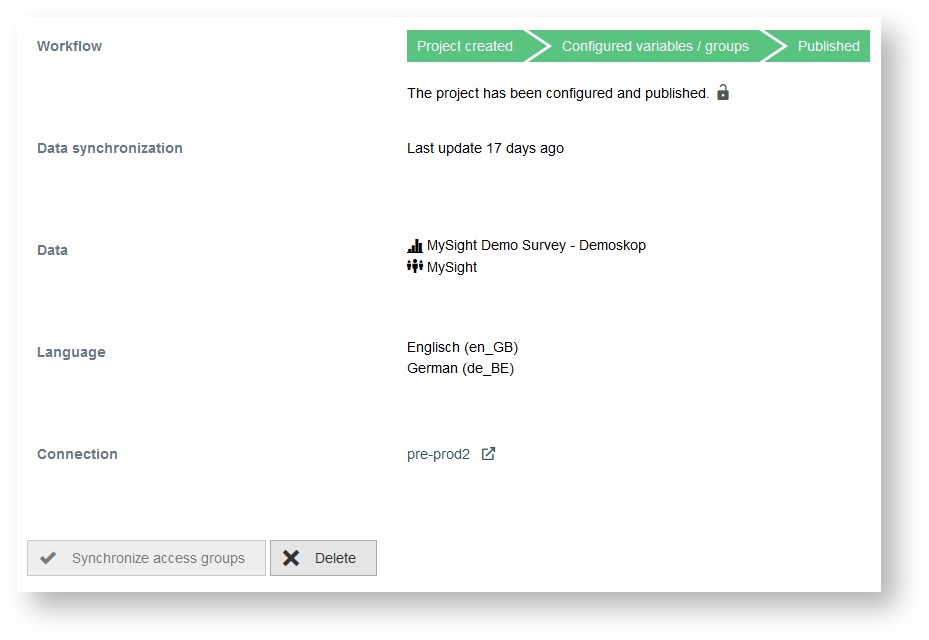
Workflow: Under this heading you will be shown a breadcrumb path, which gives a recommendation for the next steps. By clicking on the icon, you can go to the sub-navigation field Settings to perform the next step. You start there under the tab General settings.
Data synchronization: Under this point it is noted whether the MySight project has already been published and how long the synchronization with the Tableau server has been going on. The information on how long the last synchronization has taken place is given as soon as the MySight project has been released.
Data: This item specifies which EFS projects and which access groups have been selected.
Language: This item lists the survey languages created in the selected EFS projects. These will be sent to Tableau as soon as the MySight project is published. In this way, multilingual dashboards can be created.
Connection: Under this item you will find the information about which database connections have been selected. Use the icon to go to the login dialog of the table server. Enter the user name and password, which you can view under Account settings.
The board lists both the items under which you can find out about the configurations made on the subnavigation Settings (data, language and connection), as well as those that indicate the configuration progress (workflow) and synchronization status (data synchronization).
At the bottom of the board there are the buttons Publish and Delete. As soon as you publish the project, the data is transferred to the Tableau server.
Settings
After the first orientation on the sub-navigation field Overview of the project page, you switch to Settings. There are two ways to do this: Either you click on the icon below the breadcrumb path or simply click on the sub-navigation field Settings. In either case, start the MySight project configuration under the General Settings tab.
General Settings
Under the tab General settings, you can make settings for the database connection and for assigning read and write permissions.
Data connection: You select the required database connection from the available database connections
Read only: By assigning this right, you control which teams are allowed to view the status of the MySight project and use the dashboard of the MySight module integration in Portals.
Write access: By assigning this right, you control which teams are allowed to configure the MySight project. All members of a team have access to the Tableau server an can create a dashboard.
The selection of the teams is done via a drop-down list with integrated search function, which allows a time-saving procedure in case of a large number of teams. Finally, you check the desired teams. You remove the write and read rights by unchecking the checkbox. You don't have to republish the project afterwards. The withdrawal of read and write access is only valid for the dashboards created after the change.
EFS projects
Under the tab EFS projects, you can select up to five EFS projects in succession. These are stored in the same data source.
You proceed as follows:
You click on the button + EFS project.
From the drop-down list that opens, you select the EFS project.
You use the search function to quickly find the desired project by entering the project name in case of a large number of EFS projects.
After you have selected a project the data areas available for the survey type defined by the project setup are presented to you in addition to the project ID and the project name. The scope and composition of the data areas varies depending on the survey type and cannot be changed by user in MySight. For example, a personalized survey in MySight cannot be converted into an employee survey. The trashcan icon allows you to remove the selected EFS project.
Formatting the data
The data areas Questions, Survey data, Participant data and Master data have additional formatting options. The data of these areas can be created as fact or dimension.
After selecting the data, you click on the drop-down arrow.
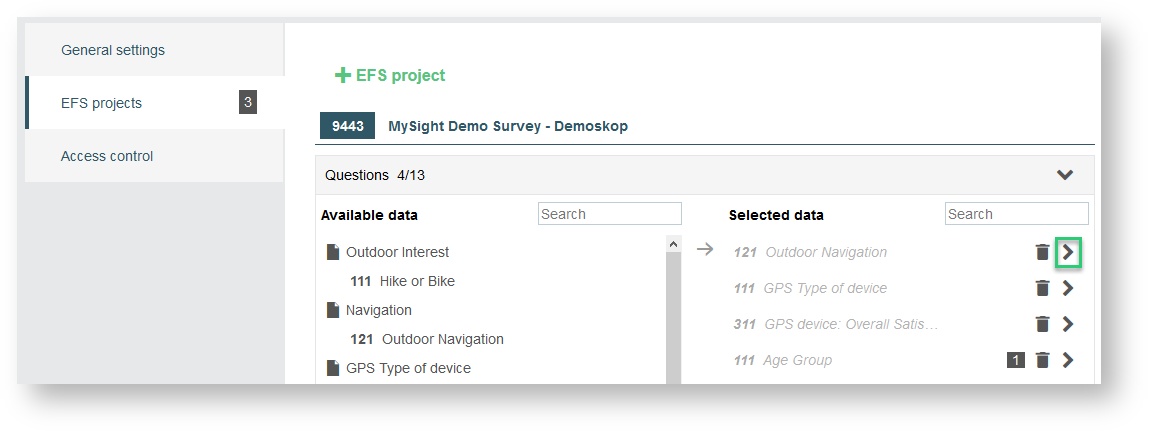
The variables belonging to the data are displayed immediately, whose formatting has a considerable influence on the work in Tableau. At this point, you decide how you want to access these variables in Tableau, whether as a fact or a dimension. To do this, you proceed in the different data areas in the same way:
You click on the gear icon to format the variables belonging to the data as a fact or a dimension. Default is fact.
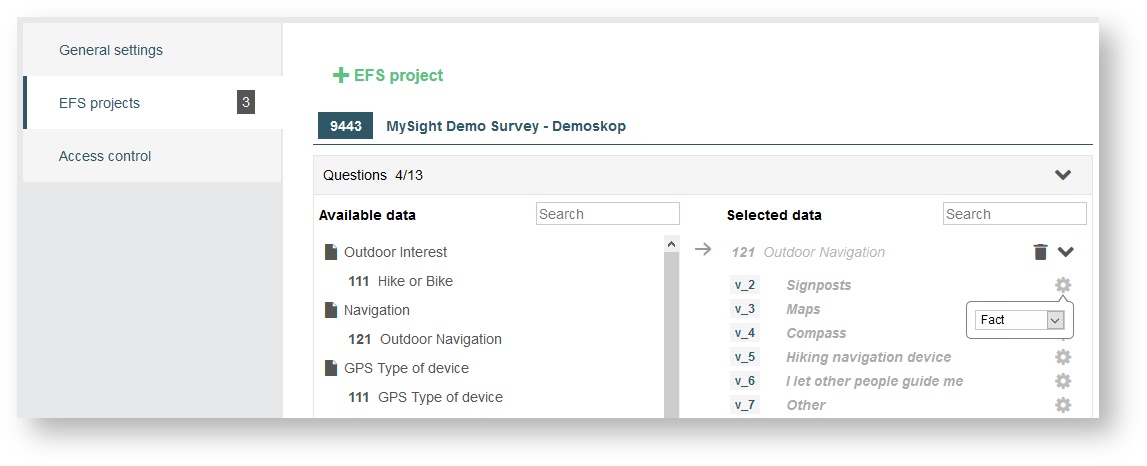
If the variable is formatted as a fact, the variable is available for further evaluation after publication in Tableau.
If the variable is formatted as a dimension, it is possible to use the variables of the data from the areas Questions, Survey data, Participant data and Master dataas splits in Tableau.
A total of 20 dimensions can be created. The information about how many variables have been formatted as dimensions can be found once on the tab EFS projects, where a counter appears after the first time you have selected a variable for dimension formatting, The other counter is located behind the selected data.
Overview of available data areas
Depending on the survey type, the number and composition of the available data areas vary, from which you take the data to be transmitted to Tableau. Below is a list of the survey types supported by MySight and the data depended on the choice of the survey types.
Anonymous survey
Questions
Survey data
Field report
Master data survey
Survey data
Participant data
Field report
Panel survey
Questions
Survey data
Field report
Personalized survey
Questions
Survey data
Participant data
Field report
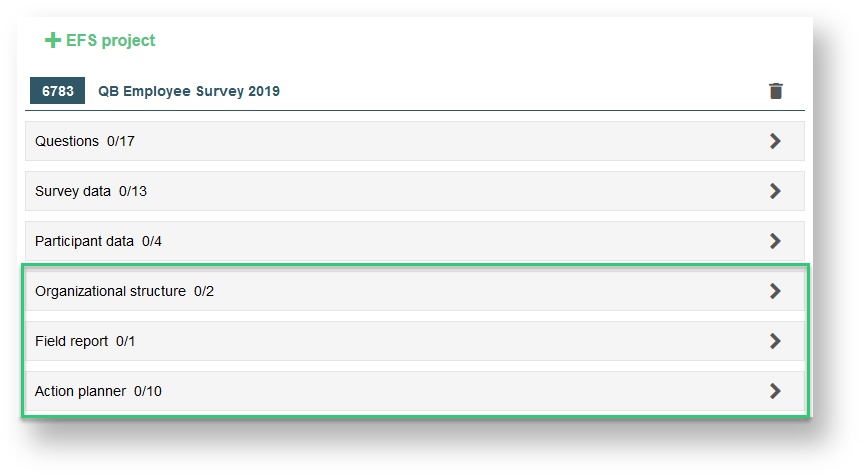
Employee survey
Questions
Survey data
Participant data
Organizational structure
Field report
Action planner
Information
Provision of the Text Dimension Variables for MySight in EFS
You can use the menu item MySight Settings in EFS to provide text variables of EFS project and a panel group in MySight. These variables can then be formatted as dimensions.
You access it using the following path:
System → Options → MySight settings → Text-Dimensions
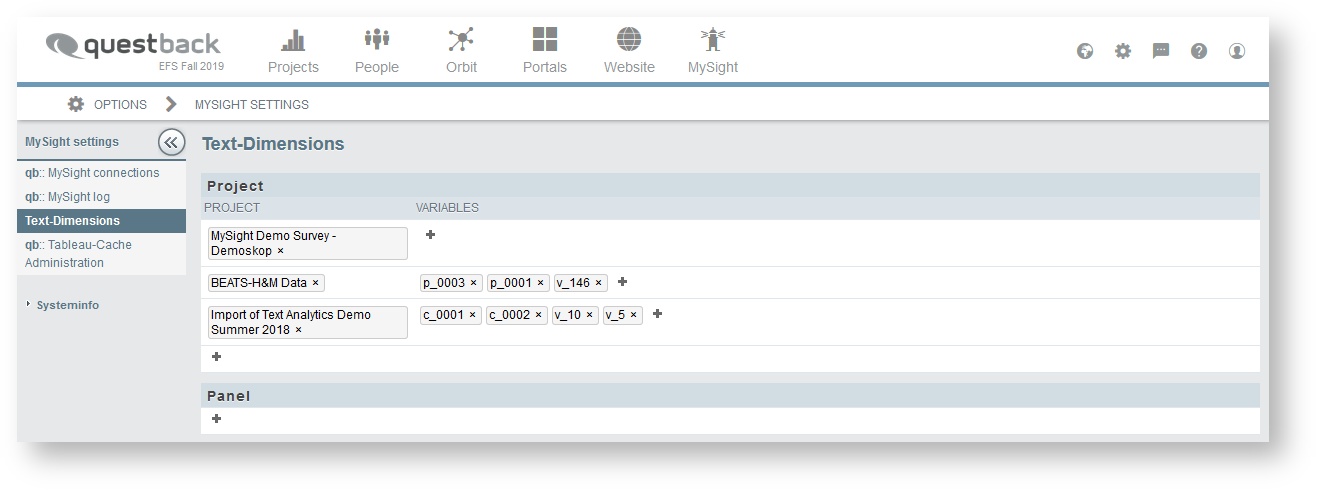
First you select an EFS project. Then follow the variables.
Under the heading "Project" you klick on the + button.
Using the modal displayed after the click, you open a drop-down list of the EFS projects.
After selecting a project, add the text variables by clicking on the + under "Variables".
In the case of text variables for a panel group, proceed in the same way. Under "Panel" you click on the +. The open modal has a drop-down list, which contains the text variables.
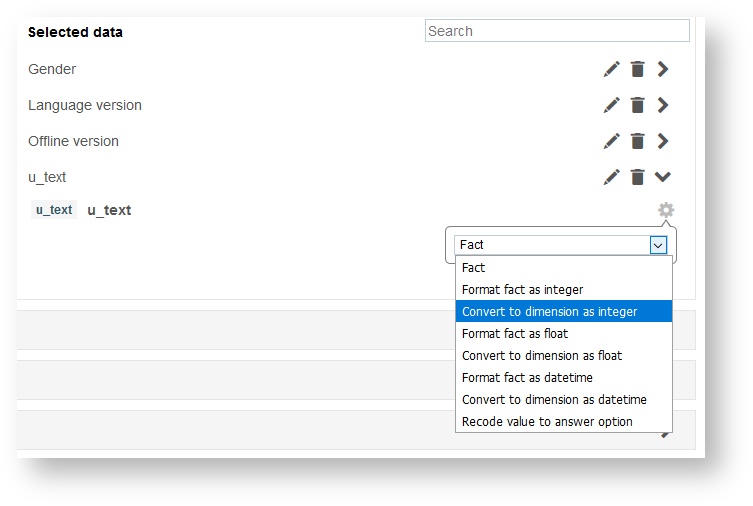
Recoding of the Text Strings
In the case of text strings, you can recode the formats fact or dimension as integer, float or datetime.
Fact
The option to convert the format fact as integer, float or datetime allows you to use the converted value after the project has been published in Tableau. You can find it there in the corresponding columns, that is in INT_VALUE, FLOAT_VALUE or DATE_VALUE.
Dimension
For the format dimension, however, if you want to convert it as integer, float or datetime: A new colimns is created in the fact table in which the correspondingly converted data type is entered.
Special feature: "Recode value to answer option"
Using the option Recode value to answer option, you can recode any text to single-choice question, taking the following in account:
The number of recoded values is limited to 100. This value can be increased by the support in exceptional cases. Any participations creating answer options beyond this limit will receive the ID 'Not answered'.
Recoding is case insensitive. Should the answer option ‘Example’ already exist, for ‘example’ with lower-case letter no new answer option will be created, but the ID of ‘Example’ will be used.
For the data type datetime, you must also specify the source format in which the date and time specifications are created in the variable. For more information visit: http://php.net/manual/de/function.date.php
Selection of the Data
You do not select any of the data areas as a whole. Instead, you take the required data from each of these. To do this, you open the data areas available within a project by clicking either on the drop-down arrow or on the name of the respective area.
Then you select the data in the following way:
The available records are displayed on the left side of the screen, which you can select by double-clicking or drag and drop and move to the right side.
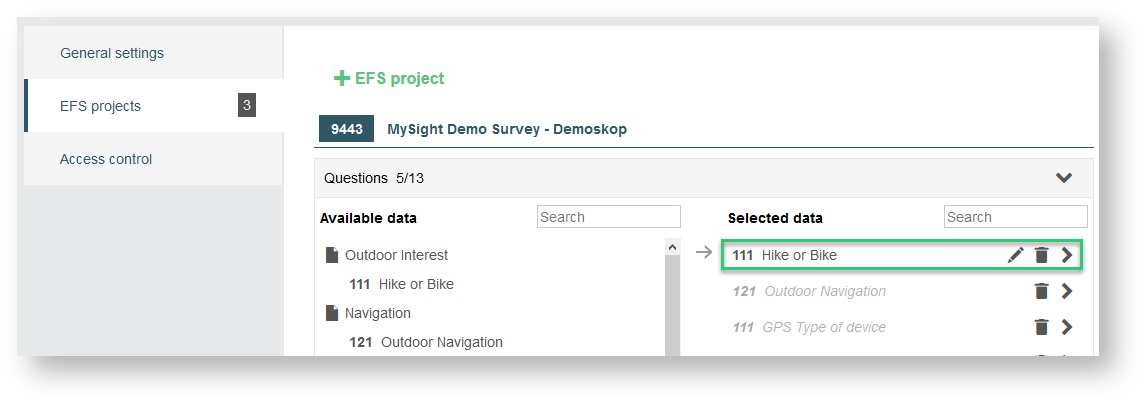
Available functions are: editing, removing and configuring records.
All selected data can be edited by clicking on the pen icon.
You assign a new name, which you confirm with a click on the check mark and then discard with a click on the X.
You use the trashcan icon to remove the record from the selection.
You use the drop-down arrow to access the formatting of the data.
The number in front of the record in the area Questions indicates which question types are involved.
The selected data are available to you after the publication of the project in Tableau.
Introduction of Different Data Areas
The following subchapter presents the data areas Organizational structure, Action planner and Field report separately.
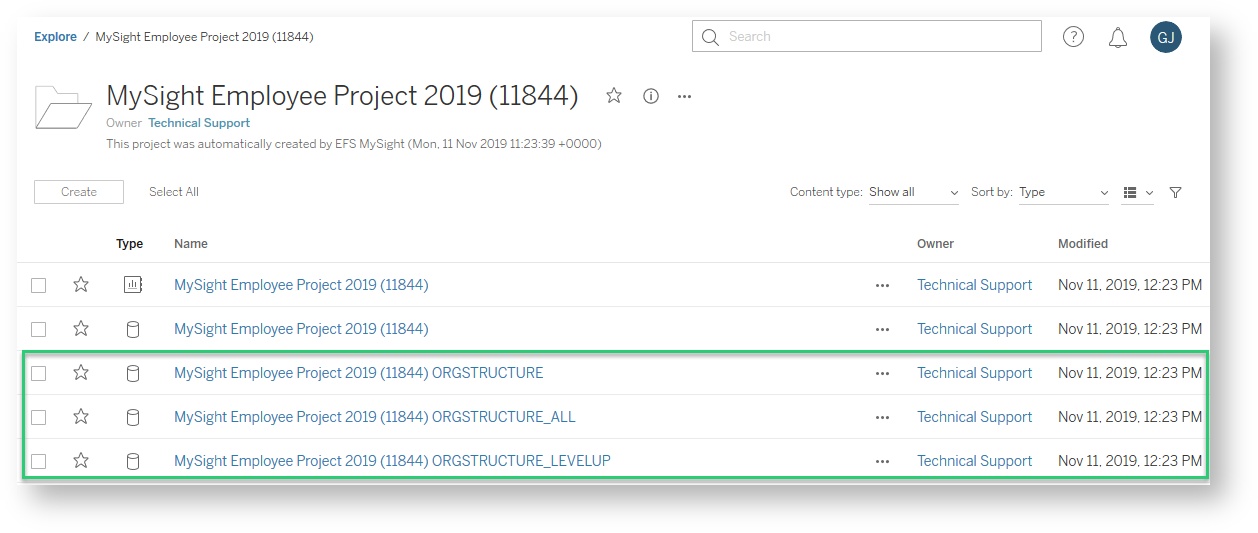
The Organizational Structure
Using the data area Organuzational structure, you can select the data Metaname and Organizational structure and transfer them to Tableau.
The data are created as data sources and are then available to you under the tab Data in Tableau.
The Action Planner in MySight
The data in the area Action planner can also be transferred to Tableau. All selected data are displayed as dimensions. The creation date issued at the start of the event and the date on which it was completed are always available
The Field Report in MySight
In the data area Field report, you can find the data that you use to recreate the field report diagram from EFS as a dashboard.
The field report data is grouped by days.
Access Control
Under the tab Access control, you select the panel access groups that you want to grant access to the dashboards of the MySight project via Portals. In addition, you select available data from the data areas Perticipant data and Master data, which serve as additional user information.
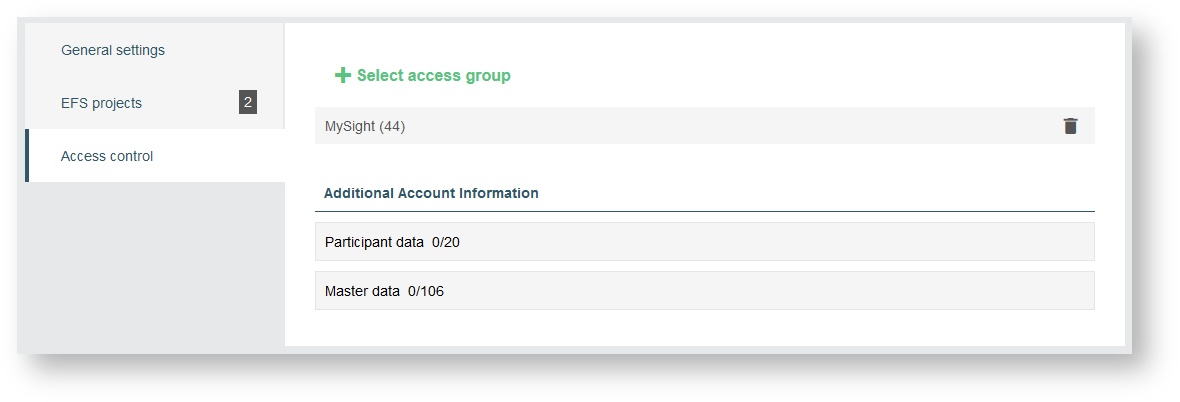
You call up the data selected within the data areas Participant data and Master data in Tableau under the tab data.
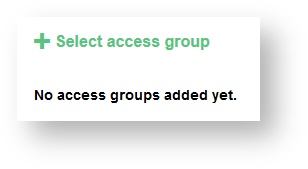
Add an Access Group
To select an access group, you click on + Select access group. You select the desired panel group from the drop-down list.
Only one group can be selected at a time. If you want to grant several panel groups access to the dashboards, you click on the button + Select access group for each additional group.
A search function helps you to find the desired group more quickly if the number of selectable groups has reached a confusing size.
The panelists, the members of the selected groups, are transferred to the table server. A new group is created.
You use the trashcan icon to remove the access group.
The default panel group cannot be selected as an access group in MySight.
Additional Account Information
For additional user information, you can use the areas Participant data and Master data. You use both areas to make the stored information of the panelists available as variables in Tableau.

Both areas are opend with the drop-down arrow.
The numbers after each of the names indicate how many records have been selected.
A maximum of 25 variables can be selected from both areas.
The selection of available data works in the same way as the one that can be done under the tab EFS projects.
Double-click or drag & drop to select the records and move them to the right side of the screen.
It is not possible to configure variables.
You have a search function.
The data in the area Master data are grouped into thematic blocks. To select these thematically related data en bloc, double-click on the headings [Basis, Budget, Internet, (default)]. You can also use drag & drop.
If you select data from Participant variables and Master data to create a dashboard in Tableau using the variables from these areas, the dynamic behavior of this dashboard is ensured: Because of the information that can be called up in these variables, the dashboard reacts differently to the respective panelist access via Portals and offers a correspondingly personalized view of the data analysis.
If you do not select any additional information for transmission to the tableau server, the email address, panelist names and panelists IDs are transmitted.
Publish a Project
After you have made all the settings in the sub-navigation field Settings, you switch back to the sub-navigation field Overview. You can check the settings on the information board before you click the green button to publish the project.
How long it takes to transfer the data depends on the size of the project and the amount of data selected.
While the data is still being synchronized, you can start working in Tableau.
New survey data from active EFS projects that have been published as MySight projects are automatically collected in the background and periodically transferred.
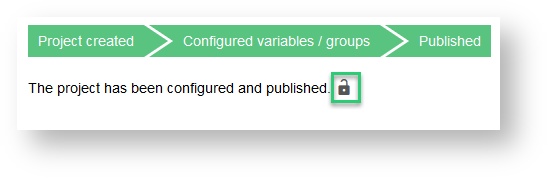
If you do not unlock the MySight project by clicking on the U-lock icon, you can only make changes under the tab Access control after a project has been published. You can both remove the already added access group and add new ones. After the changes have been made, you must synchronize the project again.
After Publishing a Project
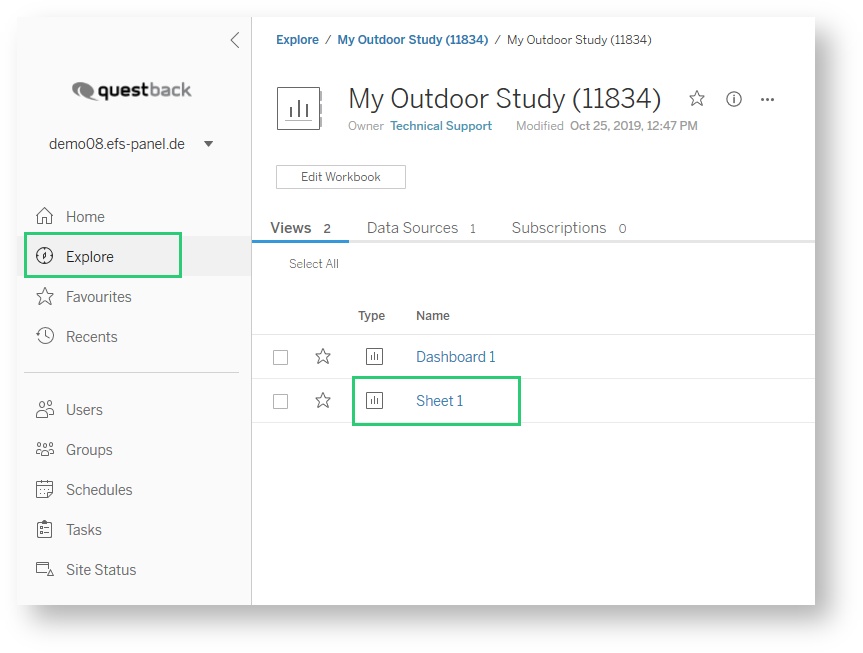
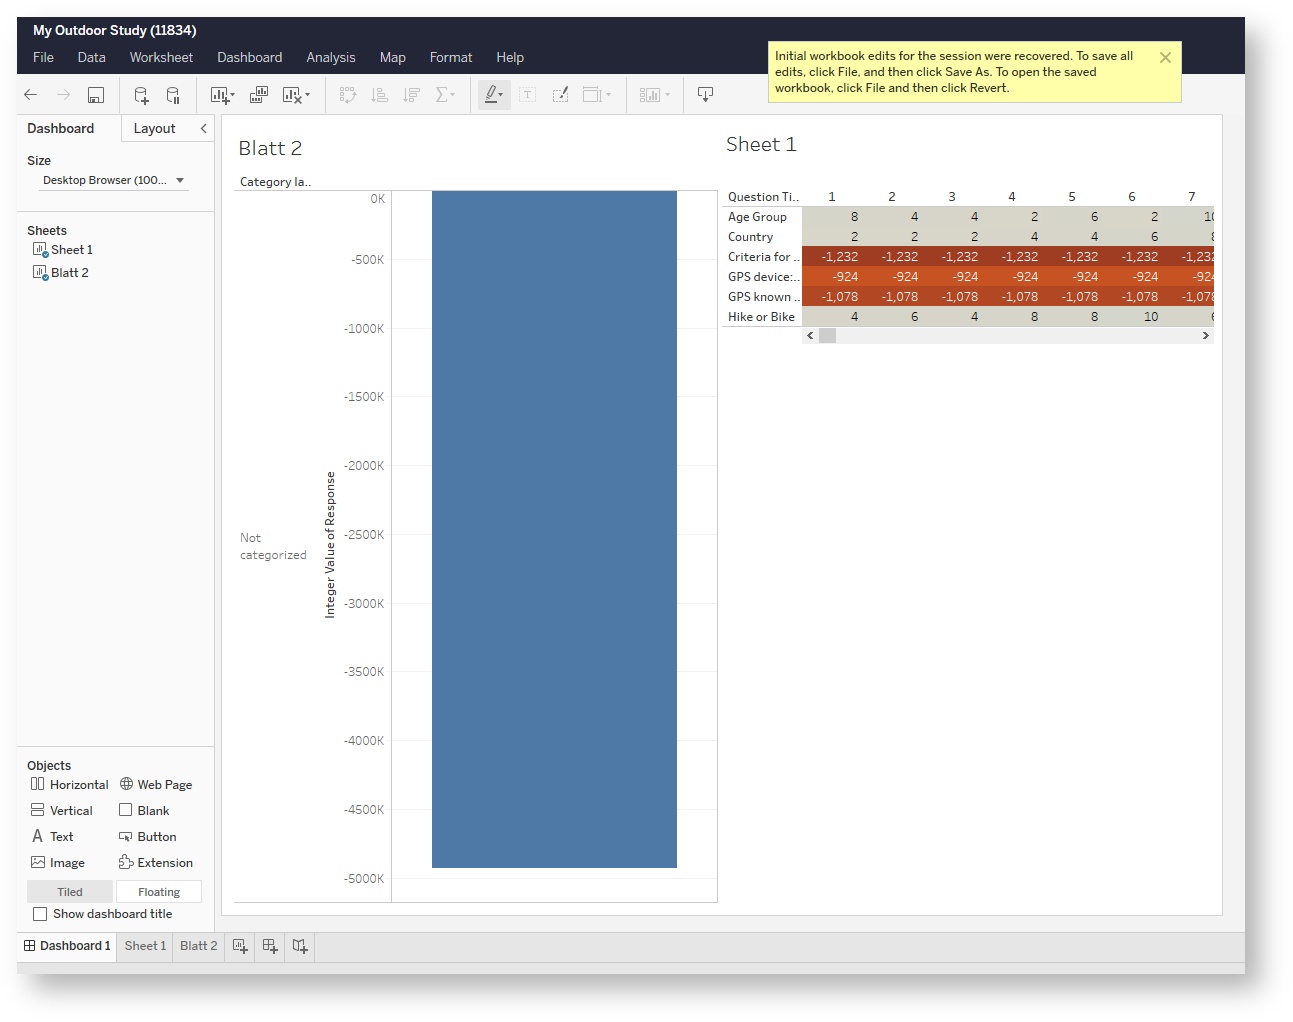
After the project has been published, Dashboard and Sheet appear to the right of the information board.
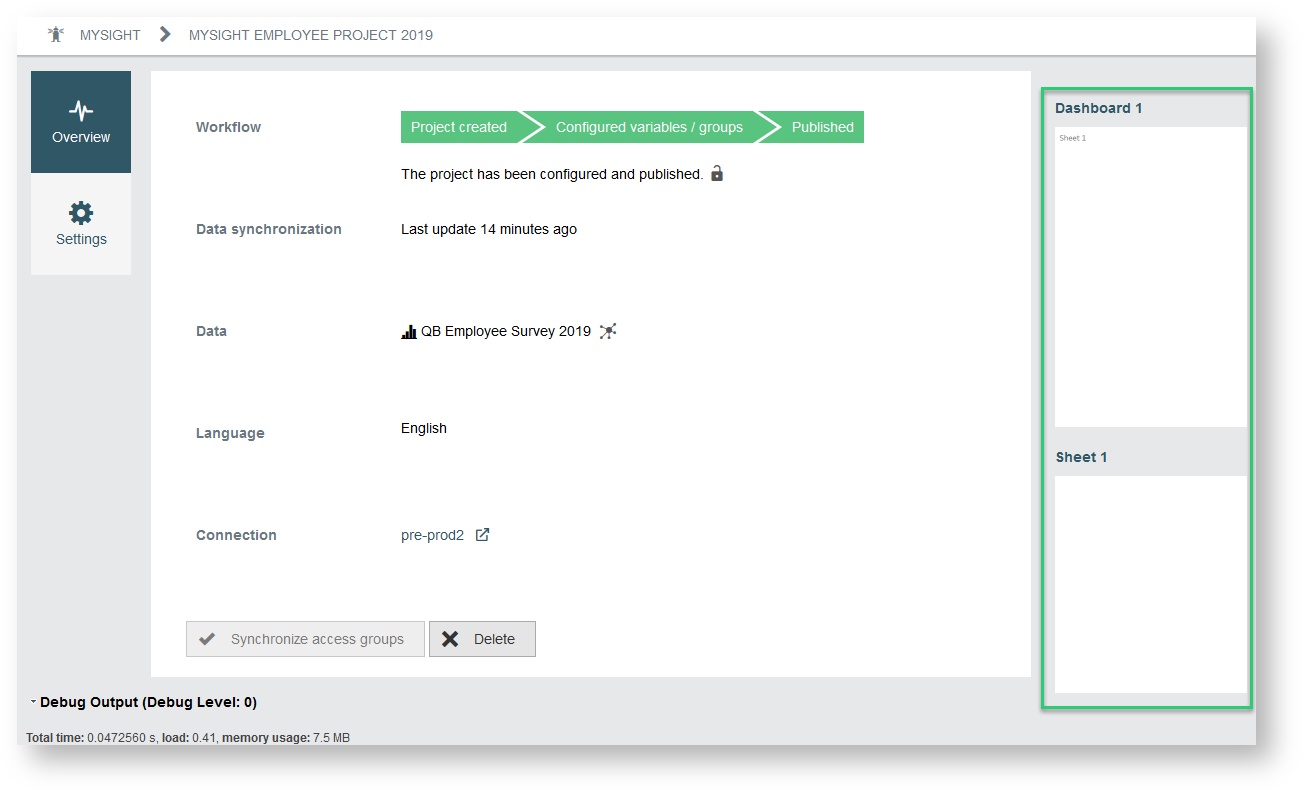
With a click on it you can switch directly to the workbook in Tableau. All you need to do is completing the login dialog for Tableau.
Data entered by participants marked as testers or from a test project will not be transferred to Tableau by MySight. This also applies if the project has completed participations (Disposition code 31 or 32).
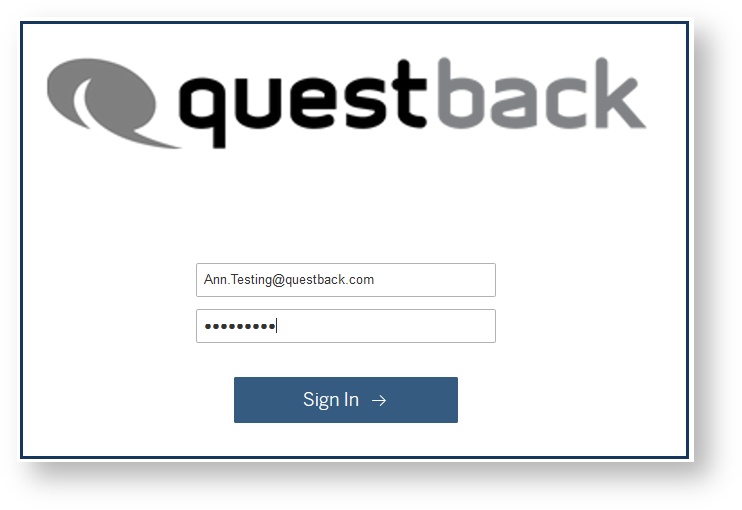
Tableau: Login and First Steps
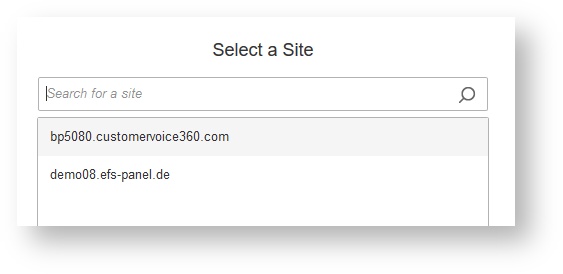
As soon as you switch to Tableau, the login page opens. Enter your email address and password.
Information
The password can be found in the account settings.
Information
Detailed documentation, help and support for working with Tableau can be found on the website:
Withdrawal of Published Projects
You withdrawal published MySight projects by clicking on the U-lock icon located under the breadcrumb path on the information board of the sub-navigation field Overview. Variables can be added and removed in the data.
The published project will be unlocked as soon as you click Accept on the confirmation modal that informs you about possible difficulties. The changes affect splits, recodings and new tables. After the changes, the project must be published again. The instance is reset. Even if a published project is withdrawn, dashboards and views remain intact.
If you change variables that we used in dashboards, they will be discarded. You will be informed by modal that you have to confirm before the change take effect. After the change, the project must be published again.
The MySight Module in Portals
To make the dashboards created by means of Tableau accessible via the exterior view of Portals, you integrate MySight as a page module in Portals. To do this, in the CMS area of Portals, you use the sub-navigation fields Pages, Settings and Navigation in turn.
You can access the CMS area by clicking on the corresponding tile on the portal overview page.
Adding the New Module
You have two options: Either you add theMySightmodule to one of the existing default pages or target pages, or you create a new page on which you embed MySight as a new module. To create a new page on which the MySight module will be integrated, proceed as follows:
On the sub-navigation field Pages click on + New page.
In the second step, click on + New row and select the desired layout.
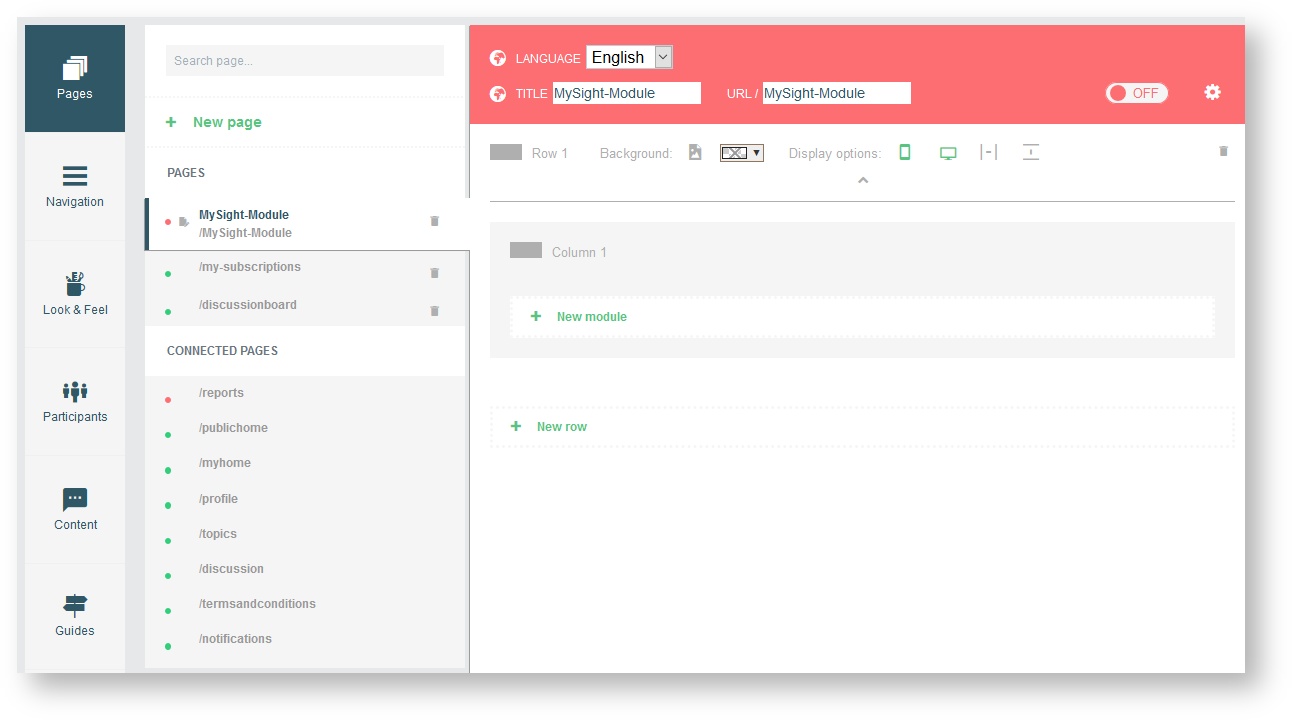
Then the new module is added. Before that, you assign a title for the new page.
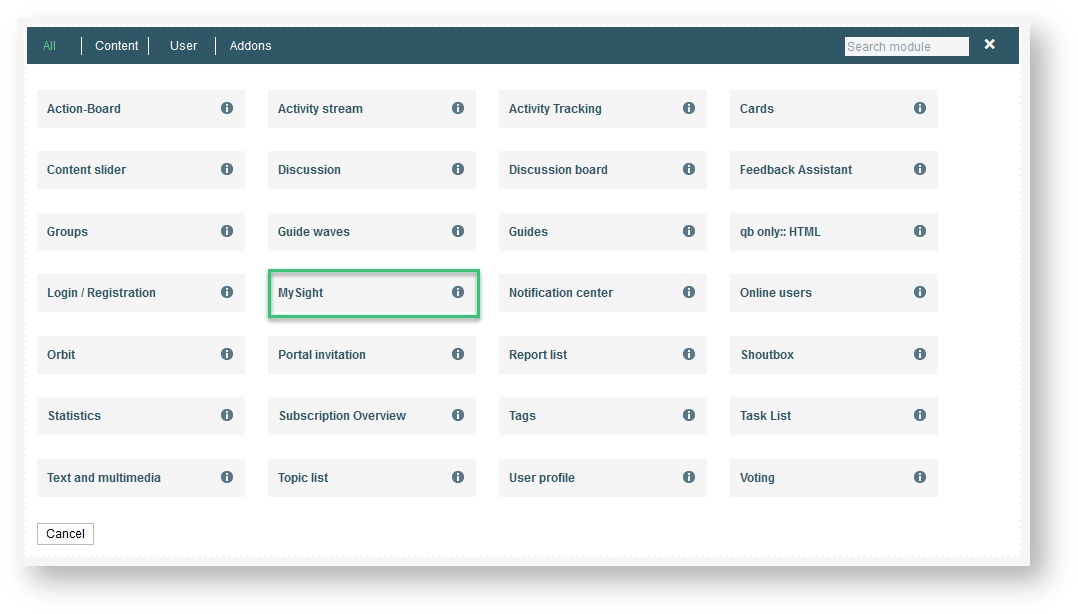
You click on + New module to open the module list.
You select the MySight module from this list.
If you want to add the MySight module on one of the existing default or target pages, the first two points of the described procedure are omitted and you insert with + New module.
Configuration of the MySight Module
To configure the MySight module, you click on the drop-down arrow, which is bordered in red in the bottom screenshot. The configuration area necessary for module integration opens immediatly.
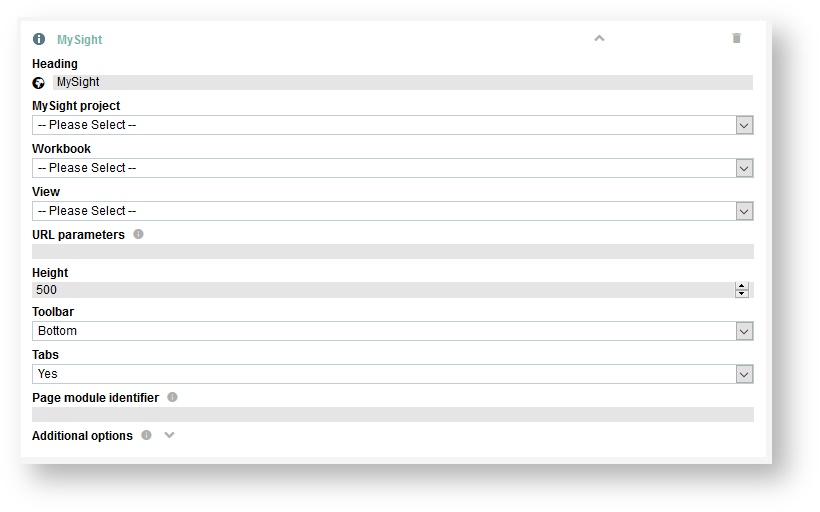
Now you make the settings for the MySight project to be used:
the workbook
the view
the display of the dashboard or the sheet.
You assign the heading that the MySight module is to wear in the exterior view of Portals.
You can also suppress the heading by simply deleting the heading text.
You select the desired MySight project.
From the worknooks stored in the selected MySight project, you select the desired workbook.
You select one of the available views.
You set the height of the dashboards. Setting the height of the dashboard within the MySight window (in the exterior view of the portal) only applies if you have not specified a value in Tableau. Preset in MySight is a height of 500 pixels.
You define where the toolbar is to be positioned, i.e. at the top or bottom. The tool list can also be deactivated.
To control the MySight page module via the Portal Api, you can assign a unique Page module identifier in the module configuration. This identifier is appended to the DOM element of the MySight module. By default, no value is assigned.
By means of the Tab configuration point it is also possible to activate or deactivate tabs.
You also dedicate yourself to height, position of the toolbar and decide if you want to use tabs. All settings that can be made effect the exterior view of Portals. All additions and settings made must be published in order to be valid.
Access Permissions for Panel Groups
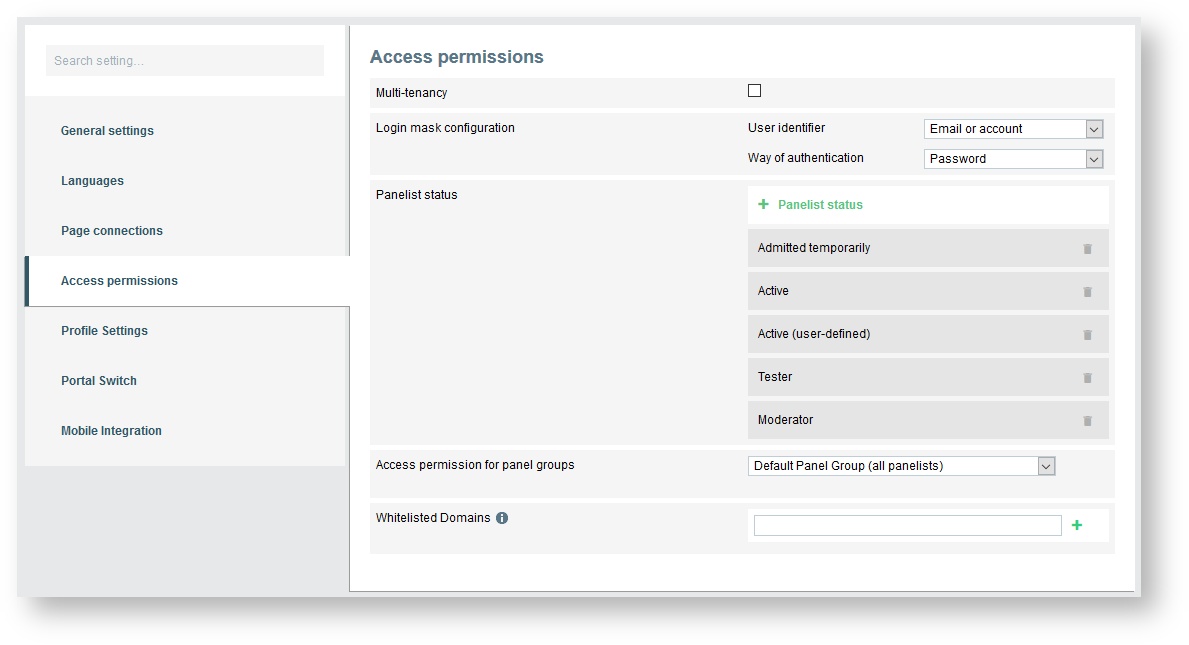
On the sub-navigation field Settings you will find the tab Access permissions. You use this to restrict access to the dashboards to specific panel groups, as you do in MySight.
In the area "Access permission for panel groups, you use the drop-down list to select "Group members".
Then click on the currently appearing button + Panel group.
You use another drop-down list to select the panel group you want to allow access to the dashboards.
You must confirm your choice with the green check mark. You reject them with X.
Of course, you can give multiple panel groups access to the dashboards by selecting another group from the second drop-down list.
After the confirmation click this group will be added to your selection.
You repeat this process until all groups that you want to grant access to have been included in the selection.
The groups that you have granted access to the dashboards are displayed by mouseover using the icon on the portal tile. By clicking on the icon, you can jump to the sub-navigation field Settings under the tab Access permissions.
Do not deny access to the panel groups that you allow within the MySight module to access from the exterior view of Portals.
Navigation
The sub-navigation field Navigation contains two additional tabs relevant to the integration of the MySight module: Main navigation and Tab navigation. You only add pages to the user navigation that offer the panellist user-oriented functions such as your own profile or logout - not the page with the integrated MySight module.
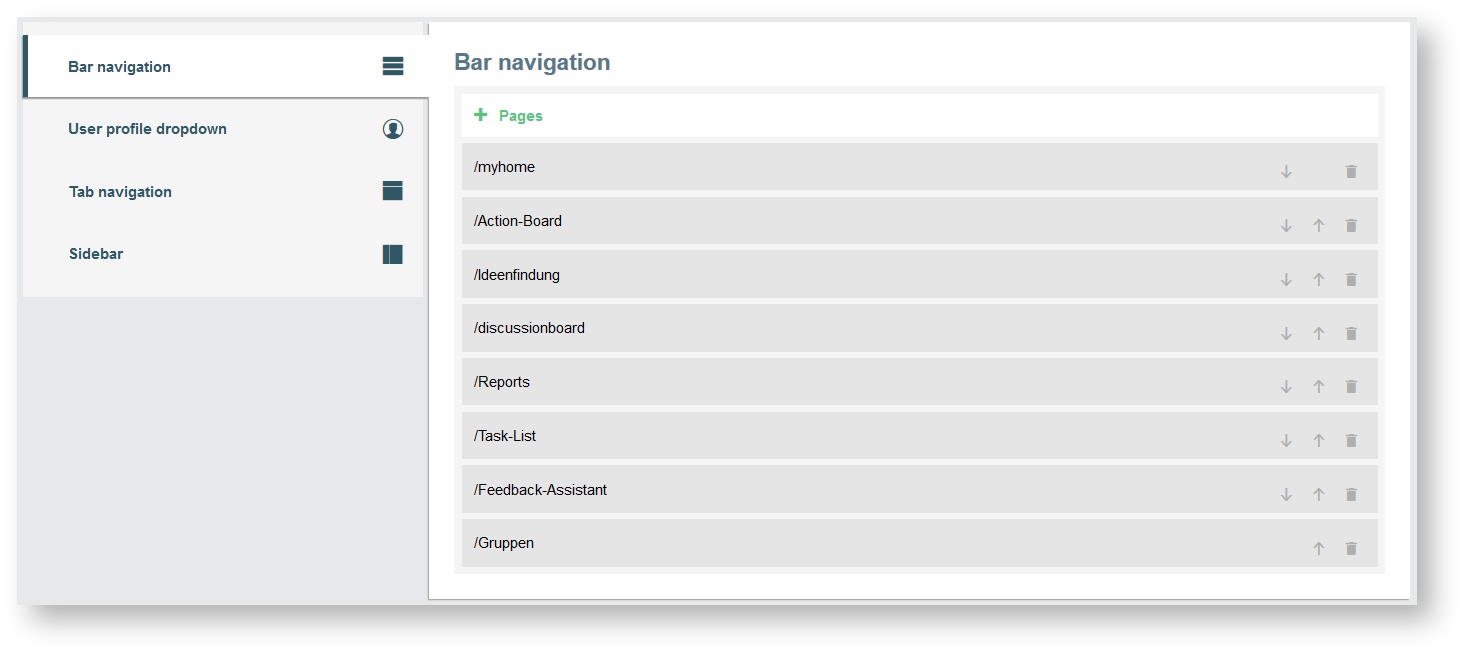
The main navigation, which is accessed via the menu on the right-hand side of the exterior view of Portals, adds a page by clicking + Page and selecting the corresponding page from the drop-down list that appears and confirming your choice with the green tick. You use the X to discard them. Using the Drag & Drop, you can still sort the order of the pages as they should appear in the overlay menu of the external portal view.
You use the Tab navigation to create the page selected in the exterior view of Portals as a tab, which allows you to switch between pages more quickly. Add the newly created page with the MySight module, as well as an existing standard or target the page that has been equipped with the MySight module, as a tab.
You click on + Page and select the desired page from the drop-down list
You can use drag & drop to control the order of the tabs and how they are to be arranged in the exterior view.
The integration has thus been successful.
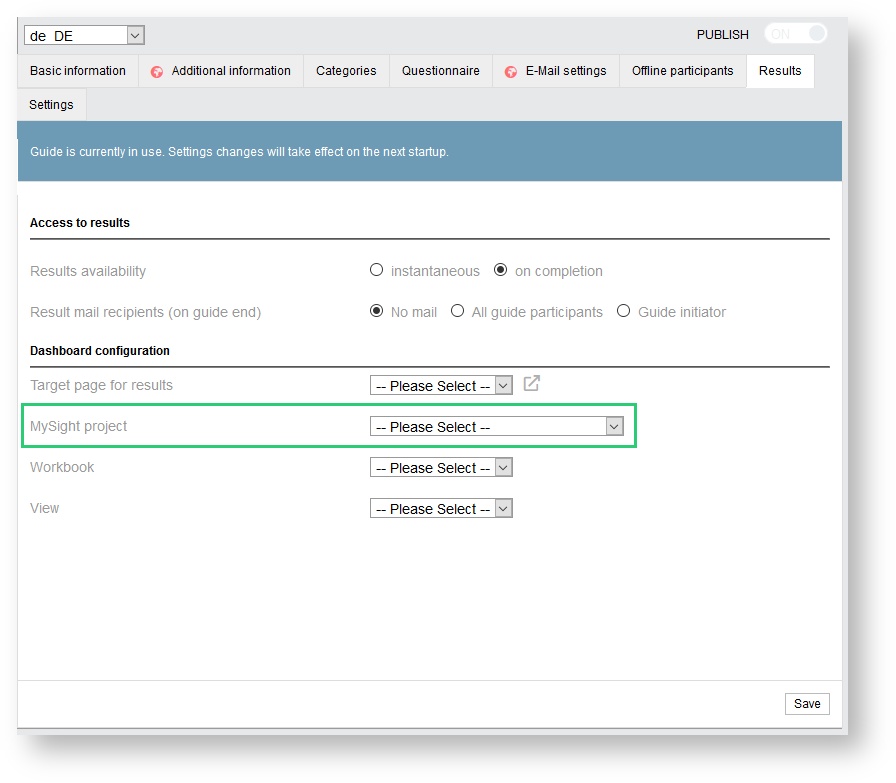
Guides - Dashboard Configuration
In the Portals menu Guides you can also create a link to the MySight module page within your portal. You select a MySight project, a workbook and a view. The dashboard you display through the MySight pages module does not have to be the same as the one offered through Guides. To start your guide, publish it.
Related content
© 2024 Tivian XI GmbH