Portals offer new ways to interact with your panelists, forming a community and collecting feedback in various ways, may it be through discussions between panelists or by taking part in surveys directly from a portal‘s interface. Qualification of survey results or the joint development of survey topics are easily feasible for each survey project.
First steps in Portals
After clicking on the Portals icon located in the navigation bar of EFS, you will be routed to the Portal Overview. Portals can be created and imported. Your new portal will be accessible only for registered panleists by default. This setting can be changed in the procress of configuring your portal.
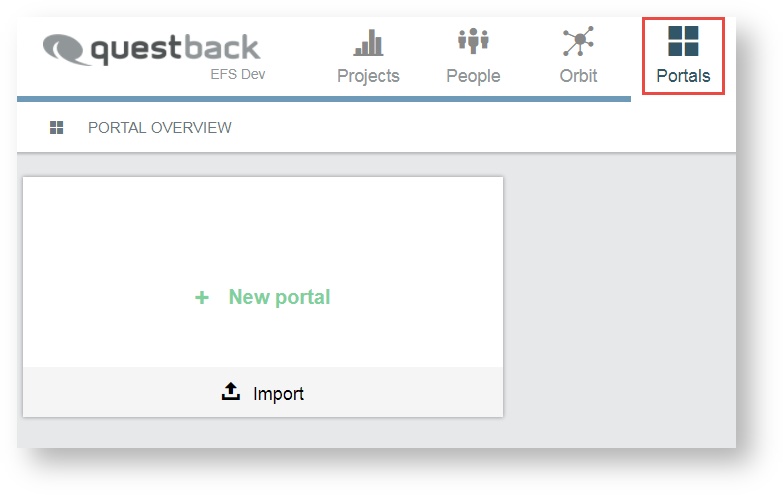
In order to create a new portal, you click on the tile button + New portal. A new tile for the portal created will be displayed. If this is your first portal, the tile will be labeled Portal 1. Portals added after that will carry increasing sequential numbering. Any new portal comes with pre- defined pages, including layout and page modules.
Edit portal in the overview
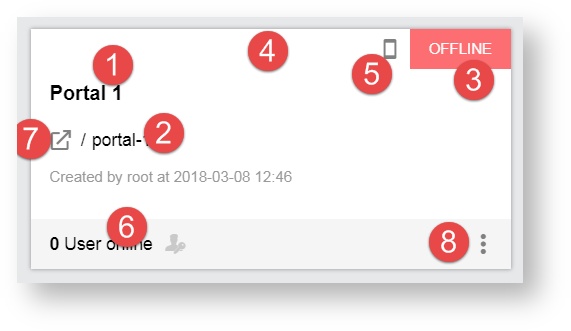
Once you have created a portal you can change its default name and access several settings right on the tile in the Portal Overview. In addition to that, you will get the information on how many users are currently online and how many have logged into your portal (e. g. 16/40 would mean that 16 out of 40 registered users are currently online).
Possible actions are:
- edit portal name
- edit URL name manually
- view portal status: online or offline
- open portal, accessing the front page
- mobile integration, allowing usage of Portals with app
- view amount of registered panelists and the share of which is currently online
- switch to exterior view of the portal
- 3 bar menu
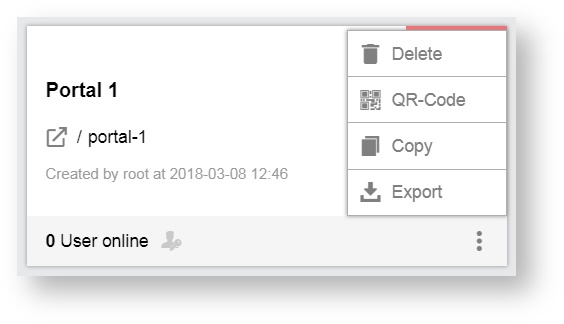
Possible actions that you can perform via the 3 bar menu are:
- Deletion
- QR-Code
- Copying
- Export
Information
Your portal's URL will be displayed as follows: InstallationURL/portal/your_portals_URL
Please note that the URL name will be automatically adapt to any portal name changes and therefore will not need to be updated manually.
However, if you choose to edit the URL name manually, the portal name remains unaffected. Note that this will prevent the URL to further adapt to any name changes made to the portal in the future.
Edit the name of a portal
You can edit the name of the portal right from the tile. You click on the tile menu icon in the bottom right hand corner of your portal tile.
You select between copying or deleting the portal.
- If you click on the delete icon, you will be asked to confirm your choice, only then the portal will be added.
- If you click on Copy, the portal will be copied.
The deletion of a portal cannot be undone and the copying may take up to a few minutes.
Open portal to access exterior view
The interface accessed by your panelists is called the exterior view. Panelists interact with each other, or take part in discussions or surveys. While editing your portal you may want to access the exterior view on the portal from the administrative interface, in order to check layout and design, etc.
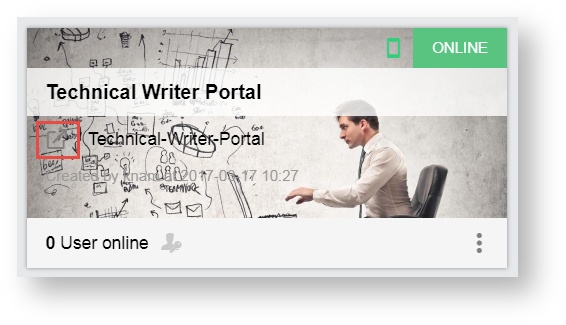
In this case you can access your portal‘s default landing page from the portal tile in the Portal Overview.
- You click on the icon to the left of the URL name field.
You will be required to log in with your panelist account information in order to enter the portal.
- You enter the login information
After logging in, you will be directed to the default landing page specified within the settings area of your portal.
Ensure that your panelist account has sufficient access rights to allow logging into your portal.
View and download the portal QR code
Having a QR-code can provide quick and easy mobile access to your portal for your panelists. You click on the QR-code icon in the top left of the portal tile.
The QR-code will be displayed and may be scanned with a suitable application on a mobile device, or may be downloaded in order to be printed on a flyer or poster, for example.
- You click on the download icon and proceed with the download.