Portals offer new ways to interact with your panelists, forming a community and collecting feedback in various ways, may it be through discussions between panelists or by taking part in surveys directly from a portal‘s interface. Qualification of survey results or the joint development of survey topics are easily feasible for each survey project.
First steps in Portals
After clicking on the Portals icon located in the navigation bar of EFS, you will be routed to the Portal Overview. Portals can be created and imported. Your new portal will be accessible only for registered panleists by default. This setting can be changed in the procress of configuring your portal.
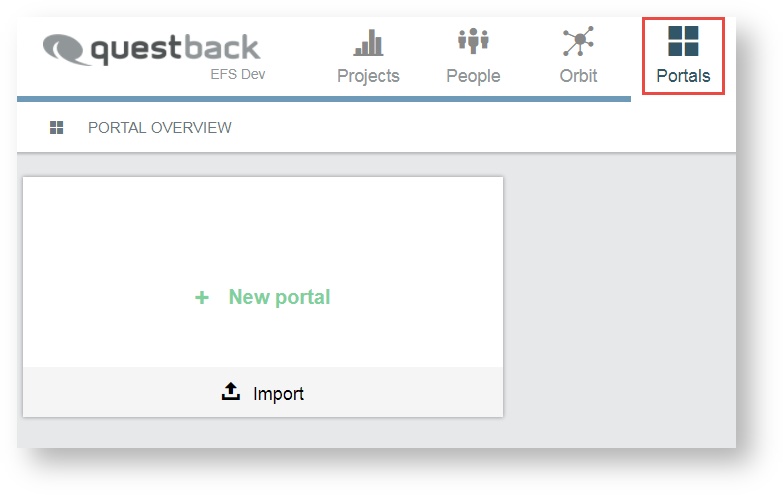
In order to create a new portal, you click on the tile button + New portal. A new tile for the portal created will be displayed. If this is your first portal, the tile will be labeled Portal 1. Portals added after that will carry increasing sequential numbering. Any new portal comes with pre- defined pages, including layout and page modules.
Edit portal in the overview
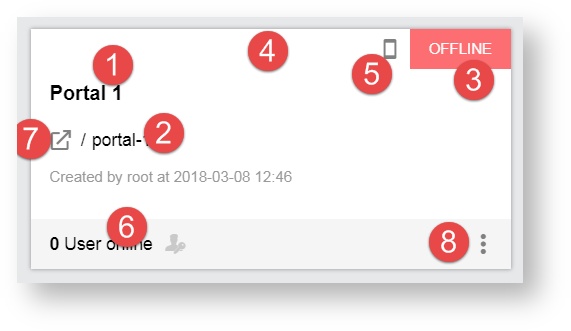
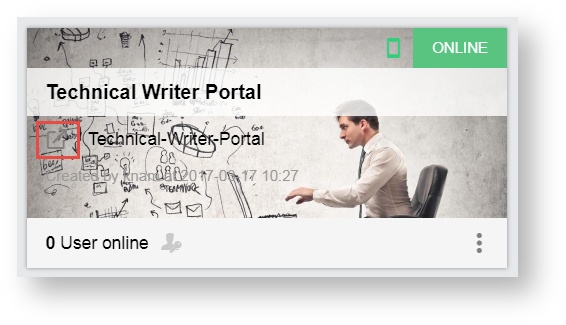
Once you have created a portal you can change its default name and access several settings right on the tile in the Portal Overview. In addition to that, you will get the information on how many users are currently online and how many have logged into your portal (e. g. 16/40 would mean that 16 out of 40 registered users are currently online).
Possible actions are:
- edit portal name
- edit URL name manually
- view portal status: online or offline
- open portal, accessing the front page
- mobile integration, allowing usage of Portals with app
- view amount of registered panelists and the share of which is currently online
- switch to exterior view of the portal
- 3 bar menu
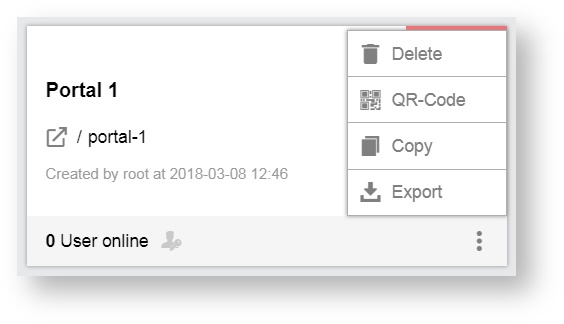
Possible actions that you can perform via the 3 bar menu are:
- Deletion
- QR-Code
- Copying
- Export
Information
Your portal's URL will be displayed as follows: InstallationURL/portal/your_portals_URL
Please note that the URL name will be automatically adapt to any portal name changes and therefore will not need to be updated manually.
However, if you choose to edit the URL name manually, the portal name remains unaffected. Note that this will prevent the URL to further adapt to any name changes made to the portal in the future.
Edit the name of a portal
You can edit the name of the portal right from the tile. You click on the tile menu icon in the bottom right hand corner of your portal tile.
You select between copying or deleting the portal.
- If you click on the delete icon, you will be asked to confirm your choice, only then the portal will be added.
- If you click on Copy, the portal will be copied.
The deletion of a portal cannot be undone and the copying may take up to a few minutes.
Open portal to access exterior view
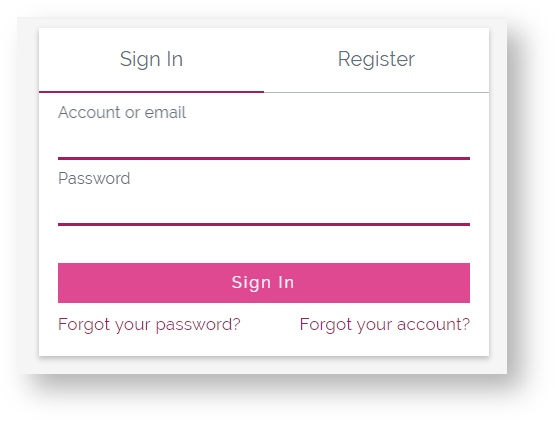
The interface accessed by your panelists is called the exterior view. Panelists interact with each other, or take part in discussions or surveys. While editing your portal you may want to access the exterior view on the portal from the administrative interface, in order to check layout and design, etc.
In this case you can access your portal‘s default landing page from the portal tile in the Portal Overview.
- You click on the icon to the left of the URL name field.
You will be required to log in with your panelist account information in order to enter the portal.
- You enter the login information
After logging in, you will be directed to the default landing page specified within the settings area of your portal.
Ensure that your panelist account has sufficient access rights to allow logging into your portal.
View and download the portal QR code
Having a QR-code can provide quick and easy mobile access to your portal for your panelists. You click on the QR-code icon in the top left of the portal tile.
The QR-code will be displayed and may be scanned with a suitable application on a mobile device, or may be downloaded in order to be printed on a flyer or poster, for example.
- You click on the download icon and proceed with the download.
Editing portal and portal CMS
The other editing and options are available once you have entered the administrative interface of your portal, i. e. the portal CMS. You open your portal from the Portal Overview by clicking on its tile.

You will be directed to the sub-navigation field Pages by default. You can now access the various settings available, create pages, add page modules and determine the layout and content of your portal‘s pages. Several tabs are displayed to the left, each containing a set of options. The default Portals package comes with a set of pre-defined pages, a set of Standard pages and Target pages. Pages defined as Target pages cannot be deleted as they are crucial to an intact navigation between pages. The layout configurations (rows and modules) for the page currently selected are displayed on the content area to the right. New pages will appear empty as they do not contain rows or modules yet.
Standard pages und target pages
The default Portals package includes the following pages (Standard pages and Target pages).
Name | Description |
|---|---|
| My Subscriptions | This page contains a list of all subscriptions of a user. |
| Discussionboard | Infrastructure for discussions. Contains one single column row fitted with the Discussion board module. Default access right: Registered users. |
The following target pages are available:
Name | Description |
|---|---|
| Public Home | This page is defined as target page and can be accessed without login. Contains one multi-column row, fitted with the Login/Registration module in the center. Default access right: Public. Target page is default landing page. |
| My Home | After log in a panelist will be directed to their personal portal overview where other panelists‘ activities are displayed. Contains one multi-column row, the narrow one fitted with the Survey list module, the wider one fitted with the Activity stream module. Default access right: Registered users. Target page after successful login. |
| Profile | A panelist‘s personal profile page. Contains one single-column row, fitted with the Public Profile module and the Activity Stream module. Default access right: Registered users. Target page for user profiles. |
| Discussion | Can be added to a discussion module to display specific discussions (must be defined for each module) Contains one single-column row, fitted with the Discussion module. Default access right: Registered users. Target page for single discussions. |
| Terms & Conditions | Contains one single-column row fitted with the Text and Multimedia module. Default access right: Public. Target page for the link Terms and Conditions e. g. on registration form. |
| Notifications | Displays notifications to content a panelist has subscribed or previously commented on, etc. Contains one single-column row fitted with the Notification Center module. Default access right: Registered users. Target page for the link on alerts visible on header in exterior portal view. |
| Topics | This page displays the available topics. |
| Reports | This page contains a list of available reports. This target page is initially set to offline mode. |
Furthermore you will find several tabs to the menu at the far left, each containing a set of possible options. These are:
- Pages
- Navigation
- Look & Feel
- Participants
- Content
- Settings
Who can access your portal
By default any panelist is allowed to access your portal. You decide to restrict access to particular groups of panelists only, adjusting the access permissions in the Portal Settings. It is also possible to restrict access to panelists with a specified panel status. Terms and Conditions will have to be accepted by panelists registering to your portal.
Subnavigation: Pages
All your portal pages are listed on the left side. A default set of target pages will be displayed in the category Target Pages, with the first one being selected and its settings displayed to the right.
You justifiy the following options:
- Status
- Page edit mode
- Adding a new page
- Editing page settings
- Searching for pages
- Designing a page
- Adding a new page module
You delete a page by clicking on the trashcan icon. There are two types of pages: Standard pages and Target pages.
Information
Any standard page can be defined as a target page on the sub-navigation field Settings under the tab Page connections. Pages defined as target pages cannot be deleted as they are crucial to an intact navigation between pages. If a target page must be deleted it must first be replaced as a target in the general settings menu by defining another page as the target. Once a replacement target page has been defined, the former target page will be displayed as a standard page (if no target is defined for this page) and can be deleted.
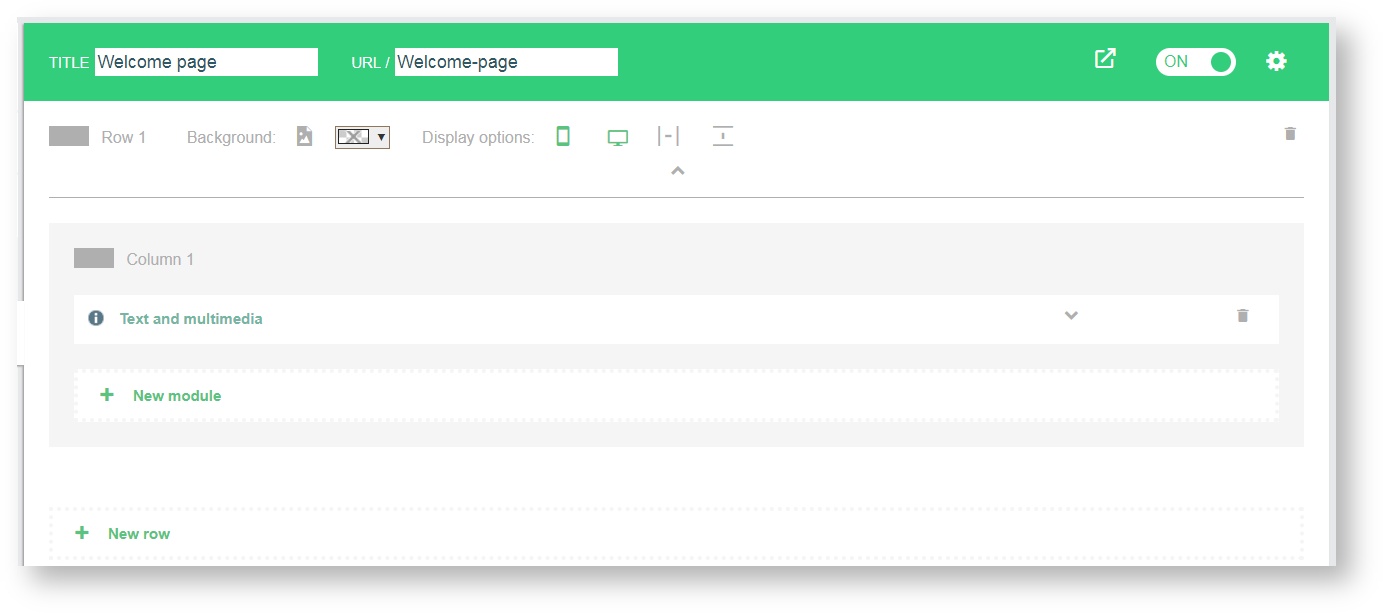
Status
There are two statuses on page level: offline and online. The colored page header informs you about the status of the page you are currently on.

Red indicates that the page is offline currently. Offline means: The page is in the offline mode and cannot be loaded from panelists with access permission.

Green indicates that the page is online. Online means: The page is in live mode and can be loaded from panelists with access permission.
You click on the sliding switch to switch the status of your page from offline to online mode and vice versa. You can easily edit a published page in online mode, since changes to the page will only be visible when you publish the changes specifically.
Page edit mode
As soon as you create new pages or edit existing ones, the page editor is active. You can end this mode by either publishing or discarding your changes. Click on the button Publish to put your changes online and on the button Discard to delete your changes.

The page editor mode prevents direct changes to live pages during working on pages.
Adding a new page
A default set of pages will be at your disposal after creating a new portal. Additional pages can be added if necessary.
- In order to create a new page, click on + New page to the top left.
- A new page will be added instantly. The new page will be set to offline by default.
- If this is the first page you have created for this portal, you will see the category Standard Pages added to the list of pages, just above the Target Pages category.
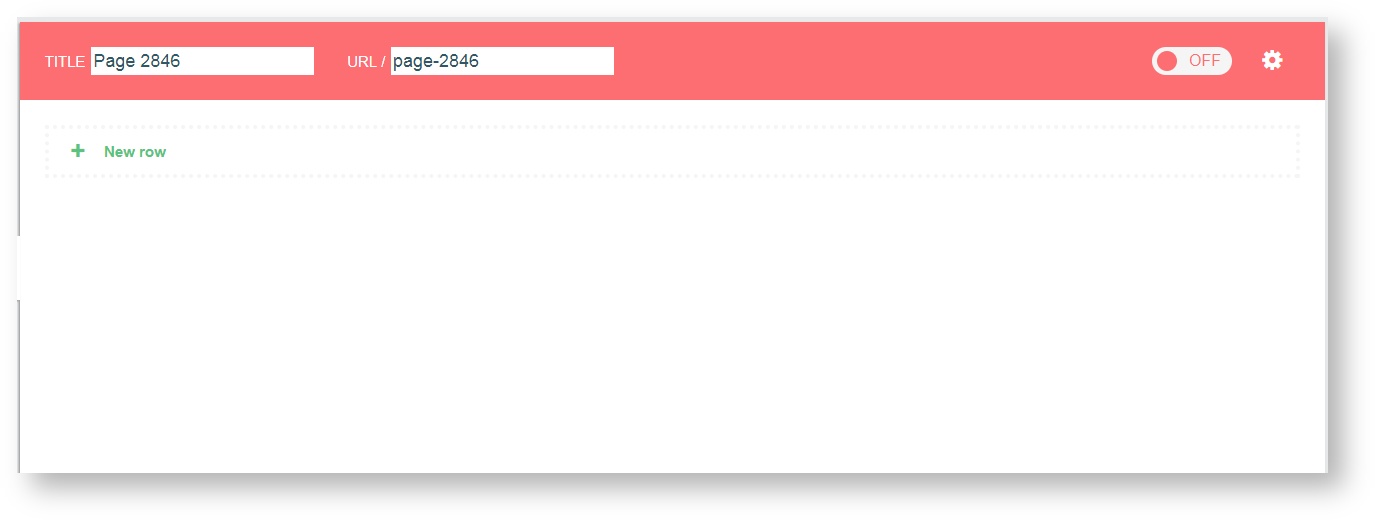
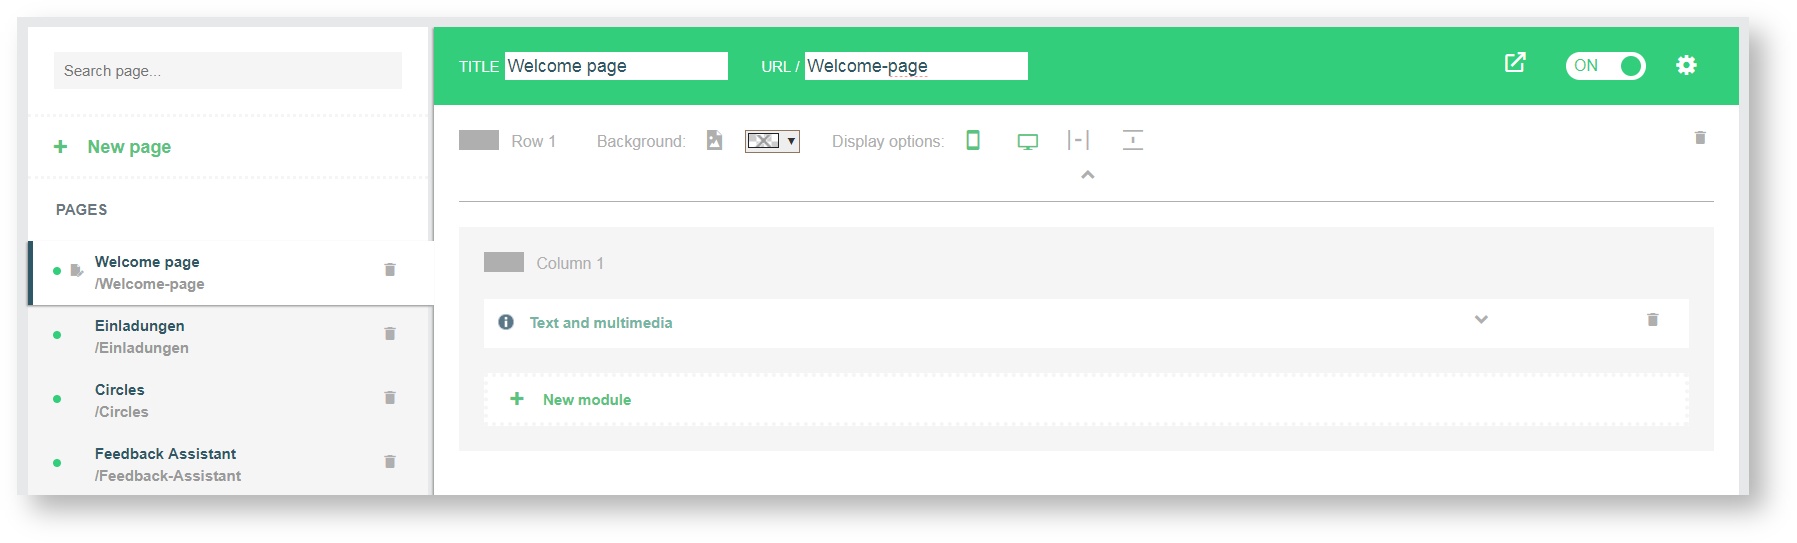
Editing page settings
The header of the content area provides you some features. You enter the desired page titel in the respective text field and edit the page URL next to it. The icon leads you to the exterior view of your portal.

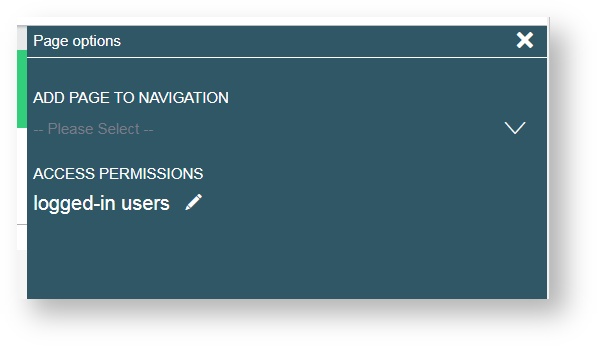
By clicking on the gear icon, the page options panel which is inserted from the right allows you to:
- add the page to navigation
- assign access permissions
Adding page to navigation
You specify which navigation element can be used in the exterior view of the portal to select the page. After clicking on the gear icon in the header, you use the drop-down arrow to display the list of the selectable navigation elements.
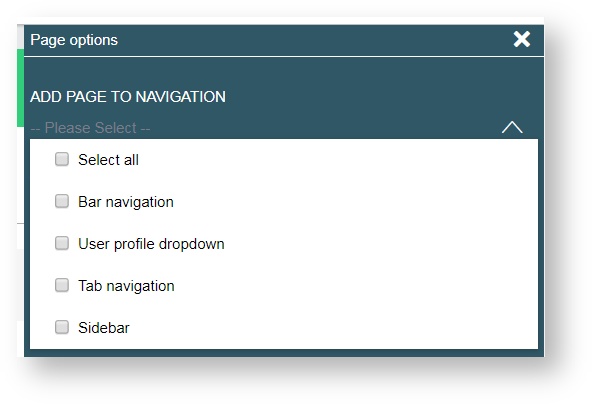
You can choose between:
- Select all
- Bar navigation
- User profile dropdown
- Tab navigation
- Sidebar
Page title and URL
The page title and URL relation works just as it does with the portal‘s title and URL relation.
- In order to change a page‘s name, click into the respective field, delete the entry and type in a new name.
- Press Enter or click any place outside the name field in order to save your changes.
The URL will adapt accordingly, if it has not been altered manually before. The URL will adjust to any title changes you make but be aware that once you manually edit the page‘s URL it will no longer adapt automatically to any future changes of the page name.
Page options
You can decide whether your page will be visible for everyone (public), or whether you want to restrict access to logged-in users, or to groups. You click on the pen icon and assign access permissions to one of the three options:
- Public
- logged-in users
- Group members
If you select Group members, a list of all created groups is displayed. Only panelist accounts meeting the criteria selected will now have access to the page‘s contents. The default setting is logged-in users.
Searching for pages
Use the incremental search function just above the button + New page to search for a specific page. You type in the name or part of the name of the page into the Search page entry field.
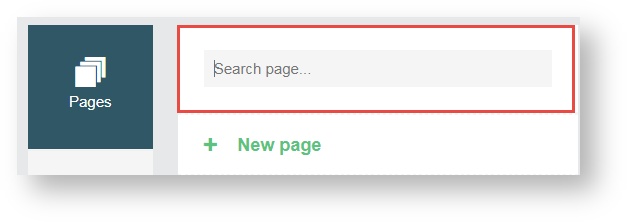
As you type, possible matches will be filtered and displayed.
- Select the desired page from the list.
- If there is no matching page, the list of pages will be empty.
- Delete your entry and try for alternative names.
Designing a page
A page‘s content can be presented in different ways. The default Portals package include pages with a default design which can be changed and adjusted to your needs.
New pages come along completely “naked” and must be given structures first in order to add content.